Buick Enclave: Propeller Shaft
SPECIFICATIONS
FASTENER TIGHTENING SPECIFICATIONS
Fastener Tightening Specifications

ADHESIVES, FLUIDS, LUBRICANTS AND SEALERS
Adhesives, Fluids, Lubricants and Sealers

DIAGNOSTIC INFORMATION AND PROCEDURES
PROPELLER SHAFT DIAGNOSIS
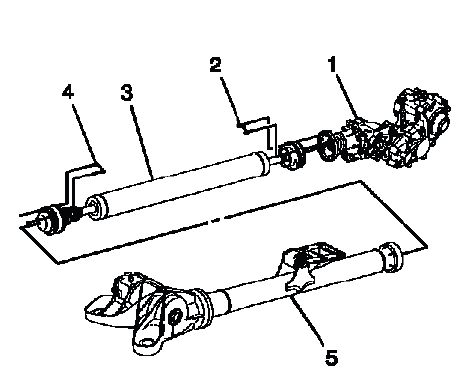
Fig. 1: View Of Propeller Shaft
Review the propeller shaft system function. Refer to Propeller Shaft Description and Operation.
Inspect for loose or missing propeller shaft-to-flange bolts (2) and (4). Tighten or replace as necessary. Refer to Propeller Shaft Replacement.
The propeller shaft (3) and the constant velocity (CV) joints are not serviceable. The CV joints and seals should be inspected periodically, whenever the vehicle is serviced.
The CV joint seals should be inspected for the following:
- Tears
- Cracks
- Contamination of the lubricating grease
Carefully pinch the seal and feel for the presence of grit
- Loose or missing seal clamps
- Leakage of lubricating grease from the seals
The CV joints should be inspected for the following conditions:
- Binding or impeded motion during axial movement of the front and rear CV joints
- Binding or impeded motion during lateral movement of the rear CV joint
- Loose or missing crimped-on end caps
- Leakage of lubricating grease from the end caps
The propeller shaft must be replaced if any of the above conditions exist. This will ensure that the propeller shaft continues to operate as intended and does not damage the other driveline components.
REPAIR INSTRUCTIONS
PROPELLER SHAFT REPLACEMENT
Removal Procedure
NOTE: Before removing the propeller shaft from the vehicle, paint or scribe reference marks on the transfer case flange to the propeller shaft flange and the rear differential drive flange to ensure minimal driveline system imbalance.
1. Raise and support the vehicle. Refer to Lifting and Jacking the Vehicle.
2. Mark the relationship of the front propeller shaft (2) to the transfer case drive flange (1).
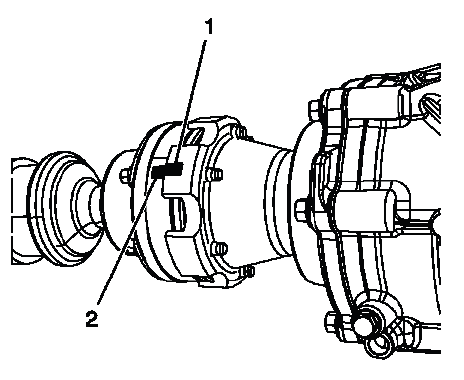
Fig. 2: View Of Front Propeller Shaft-To-Transfer Case Drive Flange
3. Mark the relationship of the rear propeller shaft (1) to the rear differential yoke (2).
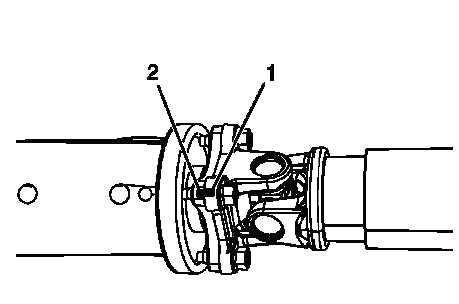
Fig. 3: View Of Rear Propeller Shaft-To-Rear Differential Yoke
4. Remove the mounting bolts and the propeller shaft bolts from the rear differential drive flange.
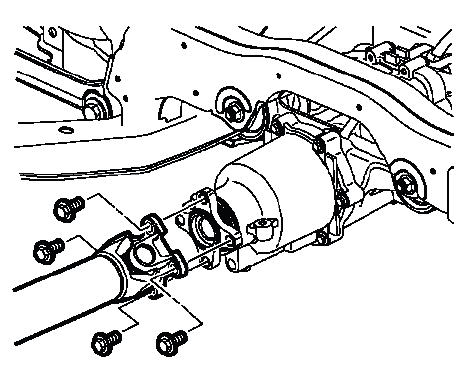
Fig. 4: Identifying Propeller Shaft Flange Mounting Bolts
5. Support the propeller shaft at the rear differential.
6. Remove the propeller shaft bolts and washers (1).
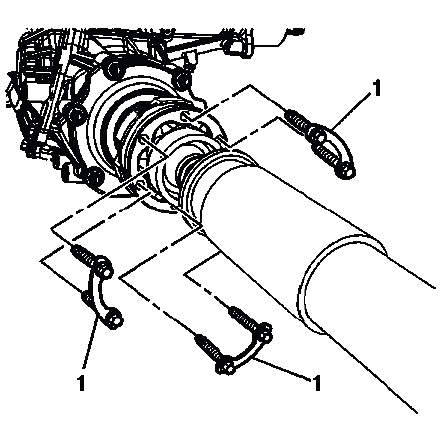
Fig. 5: View Of Propeller Shaft Bolts & Washers
7. Remove the propeller shaft (1) from the transfer case flange (2).
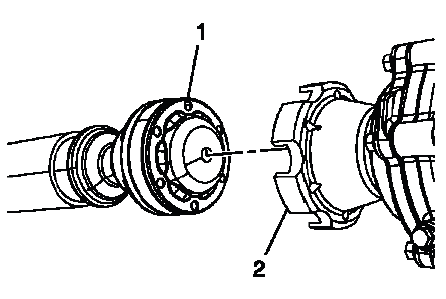
Fig. 6: View Of Propeller Shaft Transfer Case Flange
NOTE: If the propeller drive shaft cannot be removed, proceed to step 8. Failure to do so will damage the propeller shaft.
8. Place a brass drift or punch on the propeller shaft (1) between one of the notches in the transfer case drive flange (2).
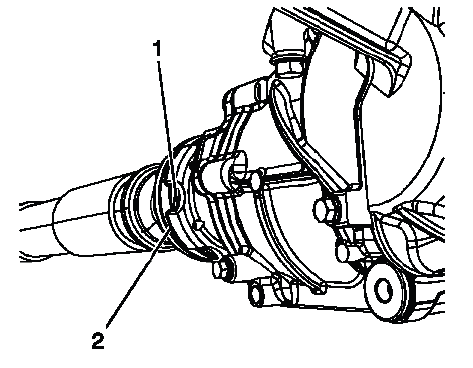
Fig. 7: Locating Propeller Shaft Transfer Case Flange
9. Using a hammer and the brass drift or punch, remove the propeller drive shaft from the transfer case drive flange (2).
10. Remove the propeller shaft (1) from the rear differential drive flange (2).
11. Support the propeller shaft at the transfer case drive flange.
12. Remove the center support mounting bolts.
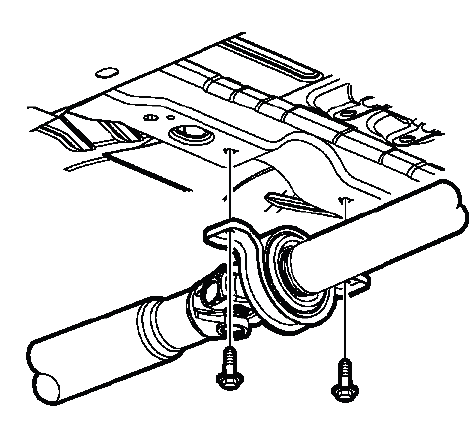
Fig. 8: View Of Propeller Shaft, Support Bearing & Bolts
13. With the aid of an assistant, remove the propeller shaft from the supports and the vehicle.
Installation Procedure
NOTE: Align the paint or scribe reference marks on the transfer case flange to the propeller shaft flange and the rear differential drive flange to ensure minimal driveline system imbalance.
1. Clean the mounting bolts for the center bearing, front and rear propeller shaft drive flanges. Apply threadlocker to the bolt threads. Refer to Adhesives, Fluids, Lubricants and Sealers.
2. With the aid of an assistant, position the propeller shaft on the supports.
3. Align the reference marks on the front propeller shaft (2) to transfer case flange (1).
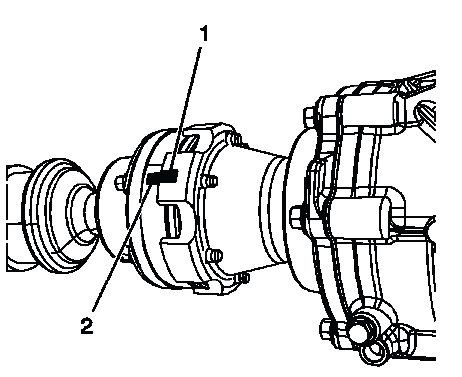
Fig. 9: View Of Front Propeller Shaft-To-Transfer Case Drive Flange
NOTE: Install a few of the mounting bolts and washers to hold the propeller shaft in place.
4. Position the center support bearing on the vehicle.
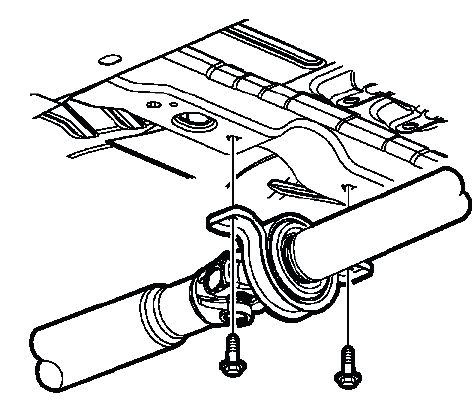
Fig. 10: View Of Propeller Shaft, Support Bearing & Bolts
NOTE: Install the mounting bolt to hold the center bearing in place.
5. Align the reference marks on the rear propeller shaft (1) to the rear differential yoke (2).
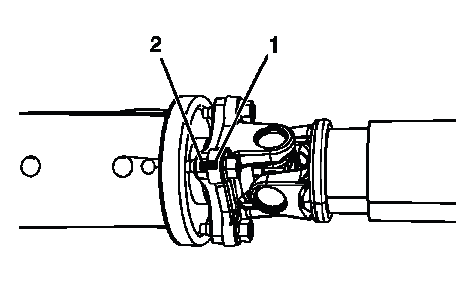
Fig. 11: View Of Rear Propeller Shaft-To-Rear Differential Yoke
NOTE: Install a few of the mounting bolts to hold the propeller shaft in place.
6. Install the remaining bolts and washers (1) from the propeller shaft to the transfer case flange and tighten to 34 N.m (25 lb ft).
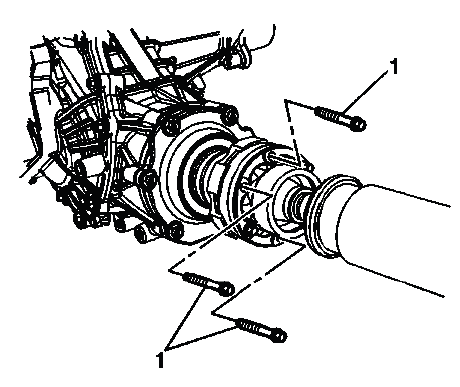
Fig. 12: Identifying Flange Bolts & Washers
CAUTION: Refer to Fastener Caution.
7. Tighten the center bearing mounting bolts to 58 N.m (43 lb ft).
8. Install the remaining mounting bolts (1) from the propeller shaft to the rear differential yoke and tighten to 58 N.m (43 lb ft).
9. Remove the supports from the vehicle.
10. Lower the vehicle.
DESCRIPTION AND OPERATION
PROPELLER SHAFT DESCRIPTION AND OPERATION
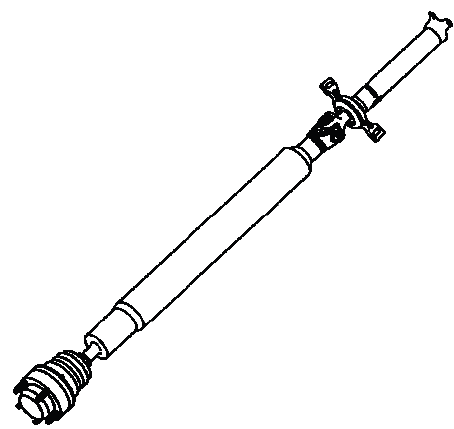
Fig. 13: View Of Propeller Shaft Assembly
The propeller shaft assembly is a 2-piece design. The front shaft consists of a plunging A-type constant velocity joint at the front and a universal joint and yoke at the rear.
The rear shaft consists of a center bearing and a center yoke, which are pressed onto the rear half of the propeller shaft and retained by a snap ring. The front and rear shafts are joined together at the yokes with a universal joint. The rear shaft attaches to the axle with a flange which is attached to the rear shaft with a universal joint.
The center bearing provides support where the front and rear shafts mate and is bolted to the underbody. The front constant velocity joint is bolted to the transfer case and the rear universal joint flange is bolted to the rear differential.
There are no serviceable parts on the propeller shaft. The propeller shaft is serviced as an assembly.

